Add DynamoDB to Go Serverless Backend with Terraform
Learn how to use DynamoDB to persist the data in a Go serverless backend. We will walk you through creating a simple endpoint to store profile data in DynamoDB and integrate it with AWS Lambda.
Overview
In the previous article "Deploy AWS serverless API with Go and Terraform", we walked through the process of building a simple REST API using AWS API Gateway and Lambda functions. Now, we are going to take it a step further and extend our serverless backend by integrating it with DynamoDB, a fully-managed NoSQL database service provided by AWS.
In this article, we are going to create a simple endpoint that stores profile data in DynamoDB. To make that possible we are going to create a DynamoDB table, write a lambda function and provide permission to the lambda to put the item into DynamoDB.
All the code can be found in the tutorial GitHub repo.
If you're interested in learning more about building serverless applications with AWS and Go, be sure to sign up for updates on future articles:

Let's get started!
DynamoDB overview
Let's have a quick look at what is DynamoDB, how DynamoDB works, and stores the data.
AWS DynamoDB is a fully managed NoSQL database service provided by AWS. It is designed to be highly scalable, flexible, and fast, and is used by many companies to store and manage large amounts of data.
Data in DynamoDB is stored in tables, which are similar to tables in a relational database. However, DynamoDB does not enforce a strict schema, which means that each item in a table can have a different set of attributes. This makes DynamoDB very flexible, as you can add or remove attributes from items without having to modify the entire table schema.
DynamoDB is fully managed by AWS, which means that it is serverless. This means that you don't need to worry about provisioning and managing servers, or worrying about scaling up or down based on demand. Instead, you can simply create a DynamoDB table, and let AWS handle the rest.
DynamoDB integrates seamlessly with other AWS serverless services like AWS Lambda. By using DynamoDB and Lambda together, we can build highly scalable and flexible serverless applications that can handle millions of requests per day, without needing to manage any infrastructure yourself. This can result in significant cost savings, as you only pay for the resources you use, and AWS takes care of all the operational details for you.
Project structure
The project structure for our project will look like this:
tutorial/
|-- lambda/
|   `-- create_profile/
|      |-- db.go
|      `-- main.go
|-- api_gateway.tf
|-- dynamodb.tf
|-- iam.tf
|-- lambda.tf
|-- locals.tf
`-- main.tf
Here we have a dynamodb.tf, where we are going to create a table for DynamoDB and db.go inside lambda/create_profile, where we are going to implement the logic of saving profiles into the DynamoDB table.
Create DynamoDB table
To create a table we are going to use aws_dynamodb_table resource:
resource "aws_dynamodb_table" "profiles" {
  name         = "tutorial_profiles"
  billing_mode = "PAY_PER_REQUEST"
  hash_key     = "email"

  attribute {
    name = "email"
    type = "S"
  }
}There are 2 different billing modes for DynamoDB table:
PROVISIONED- we provision some defined capacity and in each moment of time, we are going to have it. In this case, we can pay less if our load is smooth, predictable, and without spikes;PAY_PER_REQUEST- pay-as-you-go model when we pay for each request. That means, we are going to use it for free initially till the load per month will not reach the particular request limit. It's a good option to start when the load is unknown and unpredictable.
More details about DynamoDB pricing could be found in the official docs.
Additionally, we specify email as a hash key (aka primary key) for the table. As we are going to use only it as a primary key, we should not provide other fields for the table, as it is NoSQL, which means we can have different structures for different records.
Provide access for Lambda function to DynamoDB
To provide an access to our lambda function we need to specify a policy to put items into DynamoDB (insert operation in terms of DynamoDB):
data "aws_iam_policy_document" "allow_dynamodb_table_operations" {
  statement {
    effect = "Allow"
    actions = [
      "dynamodb:PutItem",
    ]

    resources = [
      aws_dynamodb_table.profiles.arn,
    ]
  }
}

resource "aws_iam_policy" "dynamodb_lambda_policy" {
  name        = "TutorialDynamoDBLambdaPolicy"
  description = "Policy for lambda to operate on dynamodb table"
  policy      = data.aws_iam_policy_document.allow_dynamodb_table_operations.json
}

resource "aws_iam_role_policy_attachment" "lambda_dynamodb_policy_attachment" {
  role       = aws_iam_role.lambda.id
  policy_arn = aws_iam_policy.dynamodb_lambda_policy.arn
}Here we create a new policy to allow only PutItems (like inserts) and attach it to our lambda function.
API Gateway Post request
In the previous article, we created an API Gateway with route GET /api/v1/hello. We need to update route_key in aws_apigatewayv2_route resource for our API:
// specify route that will be used to invoke lambda function
resource "aws_apigatewayv2_route" "create_profile_lambda" {
  api_id    = aws_apigatewayv2_api.simple_api.id
  route_key = "POST /api/v1/profile"
  target    = "integrations/${aws_apigatewayv2_integration.hello_world_lambda.id}"
}Lambda function Go code
Let's first define our profile structure:
type Profile struct {
	Email string `json:"email"`
}

func NewProfile(email string) *Profile {
	return &Profile{
		Email: email,
	}
}Now we need to implement a DB structure that can store items in DynamoDB. There is an official github.com/aws/aws-sdk-go-v2/service/dynamodb package for the interaction with DynamoDB. We also need different packages from github.com/aws/aws-sdk-go-v2 repository to transform Profile objects into DynamoDB-compatible representations.
// DB represents a structure to control DynamoDB interactions
type DB struct {
	cfg    aws.Config
	client *dynamodb.Client
}

// NewDB creates a new instance of *DB based on provided options
func NewDB(options ...func(*config.LoadOptions) error) (*DB, error) {
	cfg, err := config.LoadDefaultConfig(
		context.Background(),
		options...,
	)
	if err != nil {
		return nil, err
	}

	client := dynamodb.NewFromConfig(cfg)

	return &DB{
		client: client,
	}, nil
}

// CreateProfile persist the profile into dynamodb instance
func (db *DB) CreateProfile(ctx context.Context, profile *Profile) error {
	// transform profile object into a dynamodb compatible item
	item, err := attributevalue.MarshalMap(profile)
	if err != nil {
		return err
	}

	_, err = db.client.PutItem(ctx, &dynamodb.PutItemInput{
		TableName: aws.String(profilesTableName),
		Item:      item,
	})
	if err != nil {
		return err
	}

	return nil
}As we run the code inside AWS Lambda with appropriate permissions it seamlessly retrieves all necessary configurations, like a secret token to access AWS resources. That means we can create our DB instance with the default configuration, like:
db, err := NewDB()We need to define an input structure, that we are going to process. Let's keep it simple:
type Input struct {
	Email string `json:"email"`
}In the Lambda handler, we need to parse the input data from event.Body. It can be base64 encoded represented, so that case should be processed separately before parsing. After that, we should create an instance of the profile based on the input data and store it in DynamoDB using db instance. The final code of the HandleRequest is going to be like this:
func HandleRequest(ctx context.Context, event *events.APIGatewayV2HTTPRequest) (*events.APIGatewayV2HTTPResponse, error) {
	var err error
	body := []byte(event.Body)
	if event.IsBase64Encoded {
		body, err = base64.StdEncoding.DecodeString(string(body))

		if err != nil {
			return &events.APIGatewayV2HTTPResponse{
				StatusCode: 400,
				Body:       "Cannot process the request",
				Headers: map[string]string{
					"Content-Type": "text/plain",
				},
			}, nil
		}
	}

	var input *Input
	if err := json.Unmarshal(body, &input); err != nil {
		return &events.APIGatewayV2HTTPResponse{
			StatusCode: 400,
			Body:       "Cannot process the request",
			Headers: map[string]string{
				"Content-Type": "text/plain",
			},
		}, nil
	}

	db, err := NewDB()
	if err != nil {
		return &events.APIGatewayV2HTTPResponse{
			StatusCode: 500,
			Body:       "Cannot process the request at the moment",
			Headers: map[string]string{
				"Content-Type": "text/plain",
			},
		}, nil
	}

	profile := NewProfile(input.Email)
	if err := db.CreateProfile(ctx, profile); err != nil {
		fmt.Println("err creating profile", err)

		return &events.APIGatewayV2HTTPResponse{
			StatusCode: 500,
			Body:       "Cannot process the request at the moment",
			Headers: map[string]string{
				"Content-Type": "text/plain",
			},
		}, nil
	}

	return &events.APIGatewayV2HTTPResponse{
		StatusCode: 200,
		Body:       "",
		Headers: map[string]string{
			"Content-Type": "text/plain",
		},
	}, nil
}Deploying the infrastructure and the Go code
As usual, we are going to plan the resources first:
terraform init
terraform plan
We should see:
...

Plan: 15 to add, 0 to change, 0 to destroy.

Changes to Outputs:
  + api_url = (known after apply)
Looks correct, so let's deploy it using
terraform applyand typing yes.
After the deployment is completed we should see the result and our output api_url:
Apply complete! Resources: 15 added, 0 changed, 0 destroyed.

Outputs:

api_url = "https://8zmd4qmhd2.execute-api.us-east-1.amazonaws.com"
You should have your own api_url subdomain, as AWS generates it uniquely.
🔍 Validate the DynamoDB Lambda integration

To verify that we integrated a DynamoDB with Lambda in a correct manner let's do a simple curl query to our API endpoint:
curl -X POST -d '{"email": "test@gmail.com"}' https://8zmd4qmhd2.execute-api.us-east-1.amazonaws.com/golang/api/v1/profileHere we use the endpoint provided by terraform output (https://8zmd4qmhd2.execute-api.us-east-1.amazonaws.com). It's an API Gateway URL. We should extend it with API Gateway stage (golang) and our route for the endpoint (api/v1/profile).
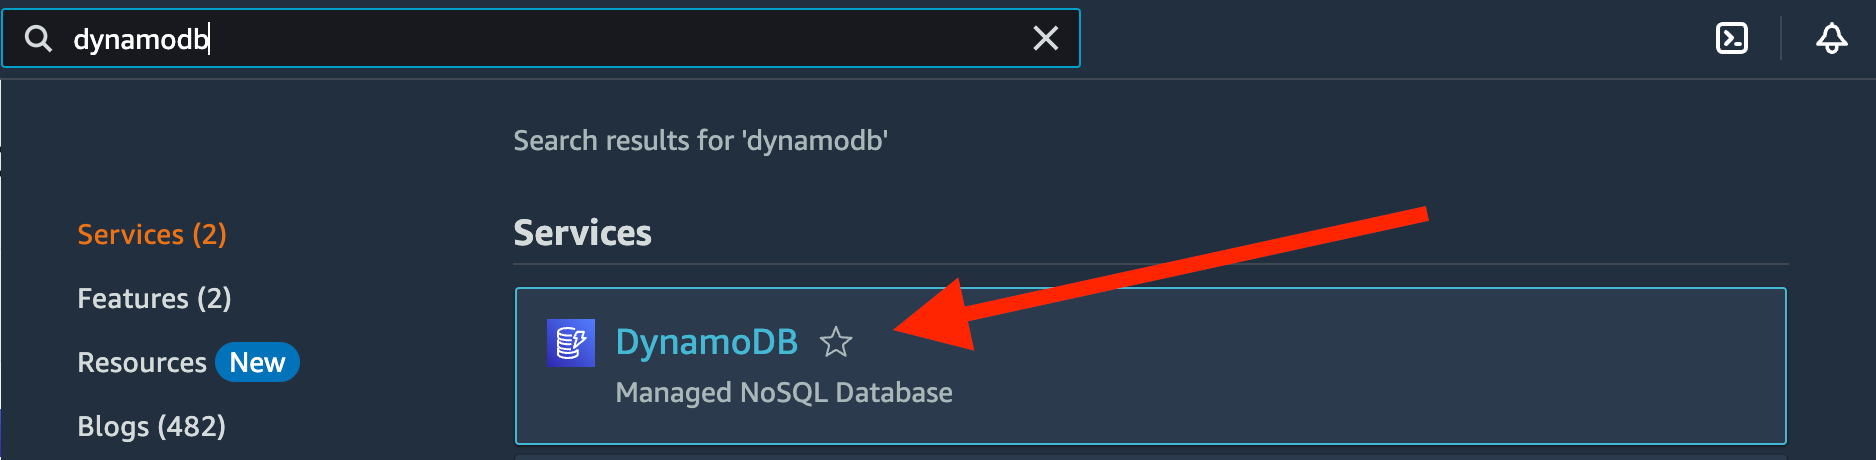
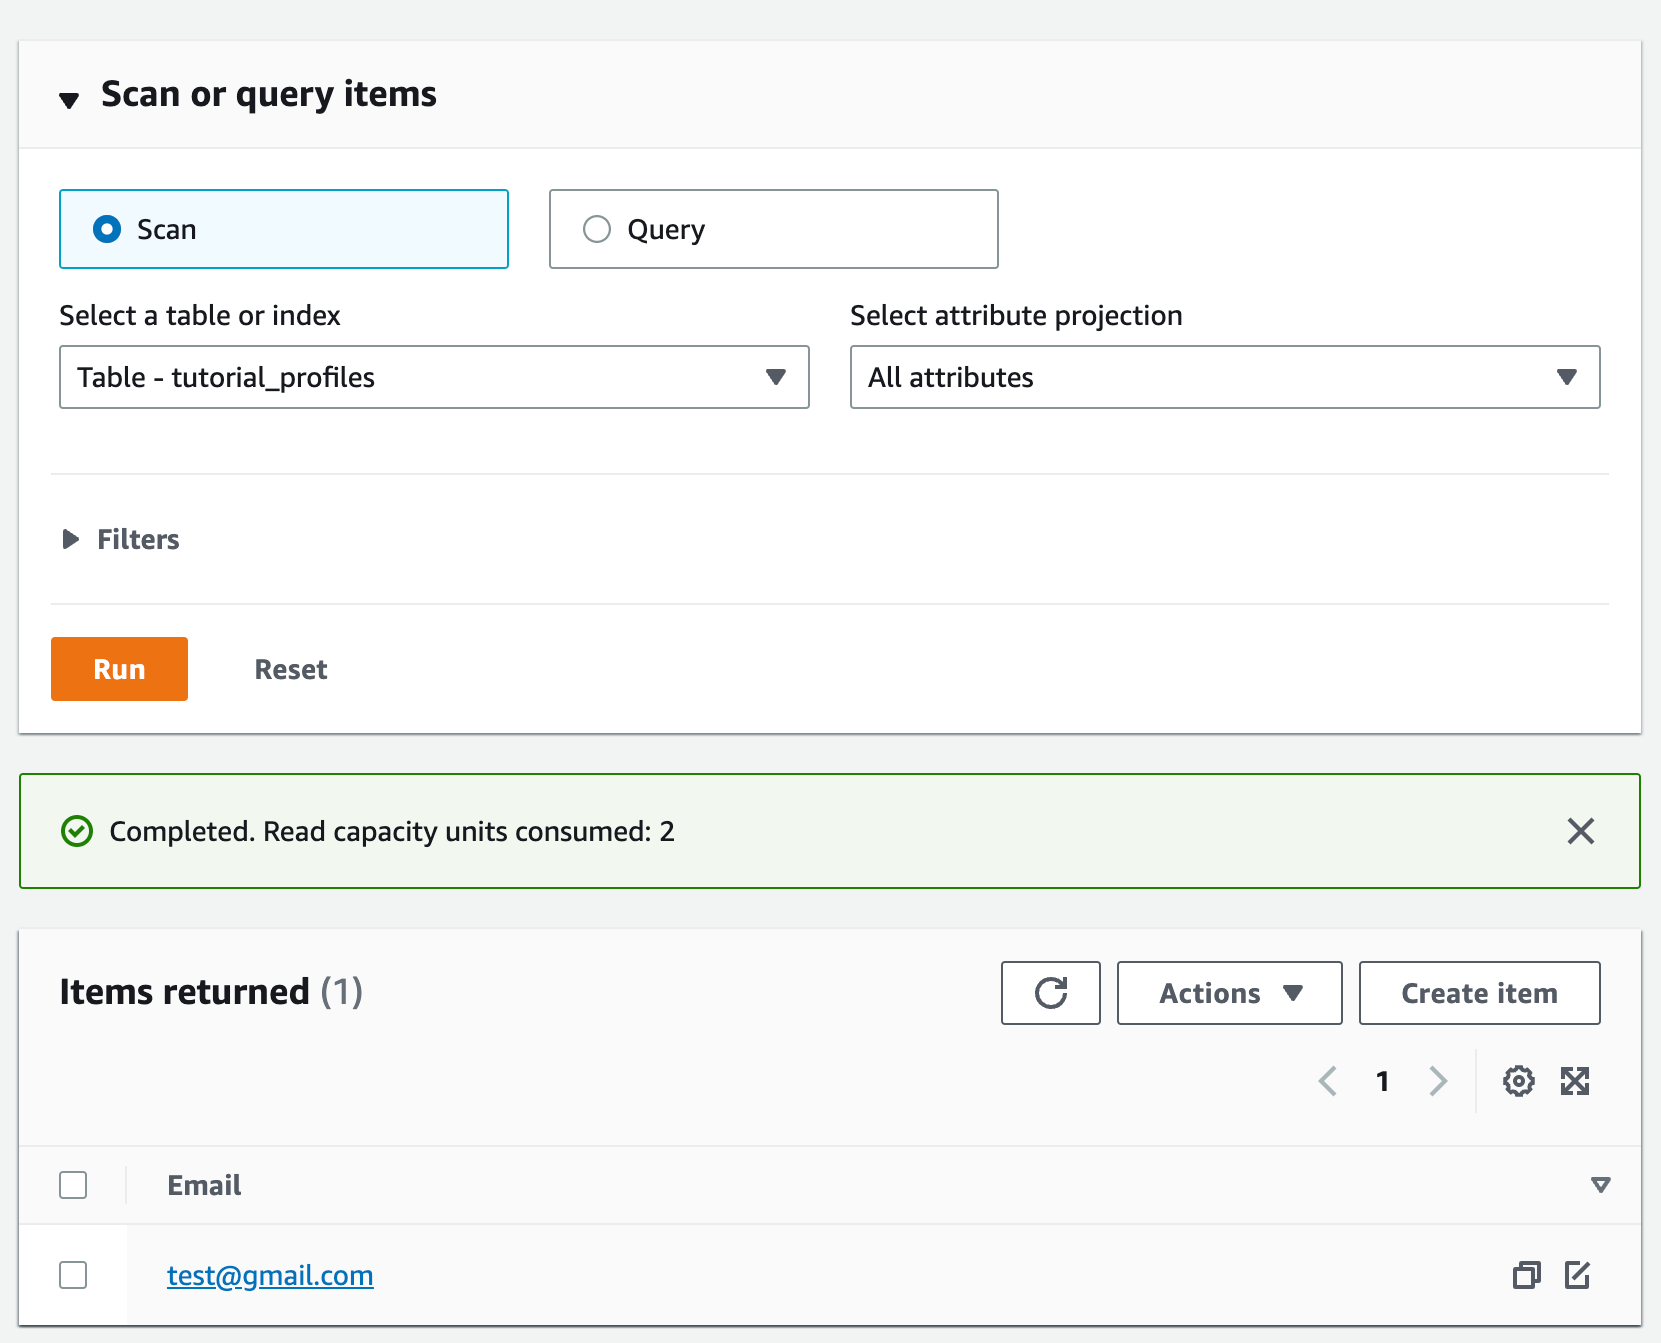
Now we should find a new profile with an email test@gmail.com in the DynamoDB tutorial_profiles table. Let's go to the DynamoDB and find the table:
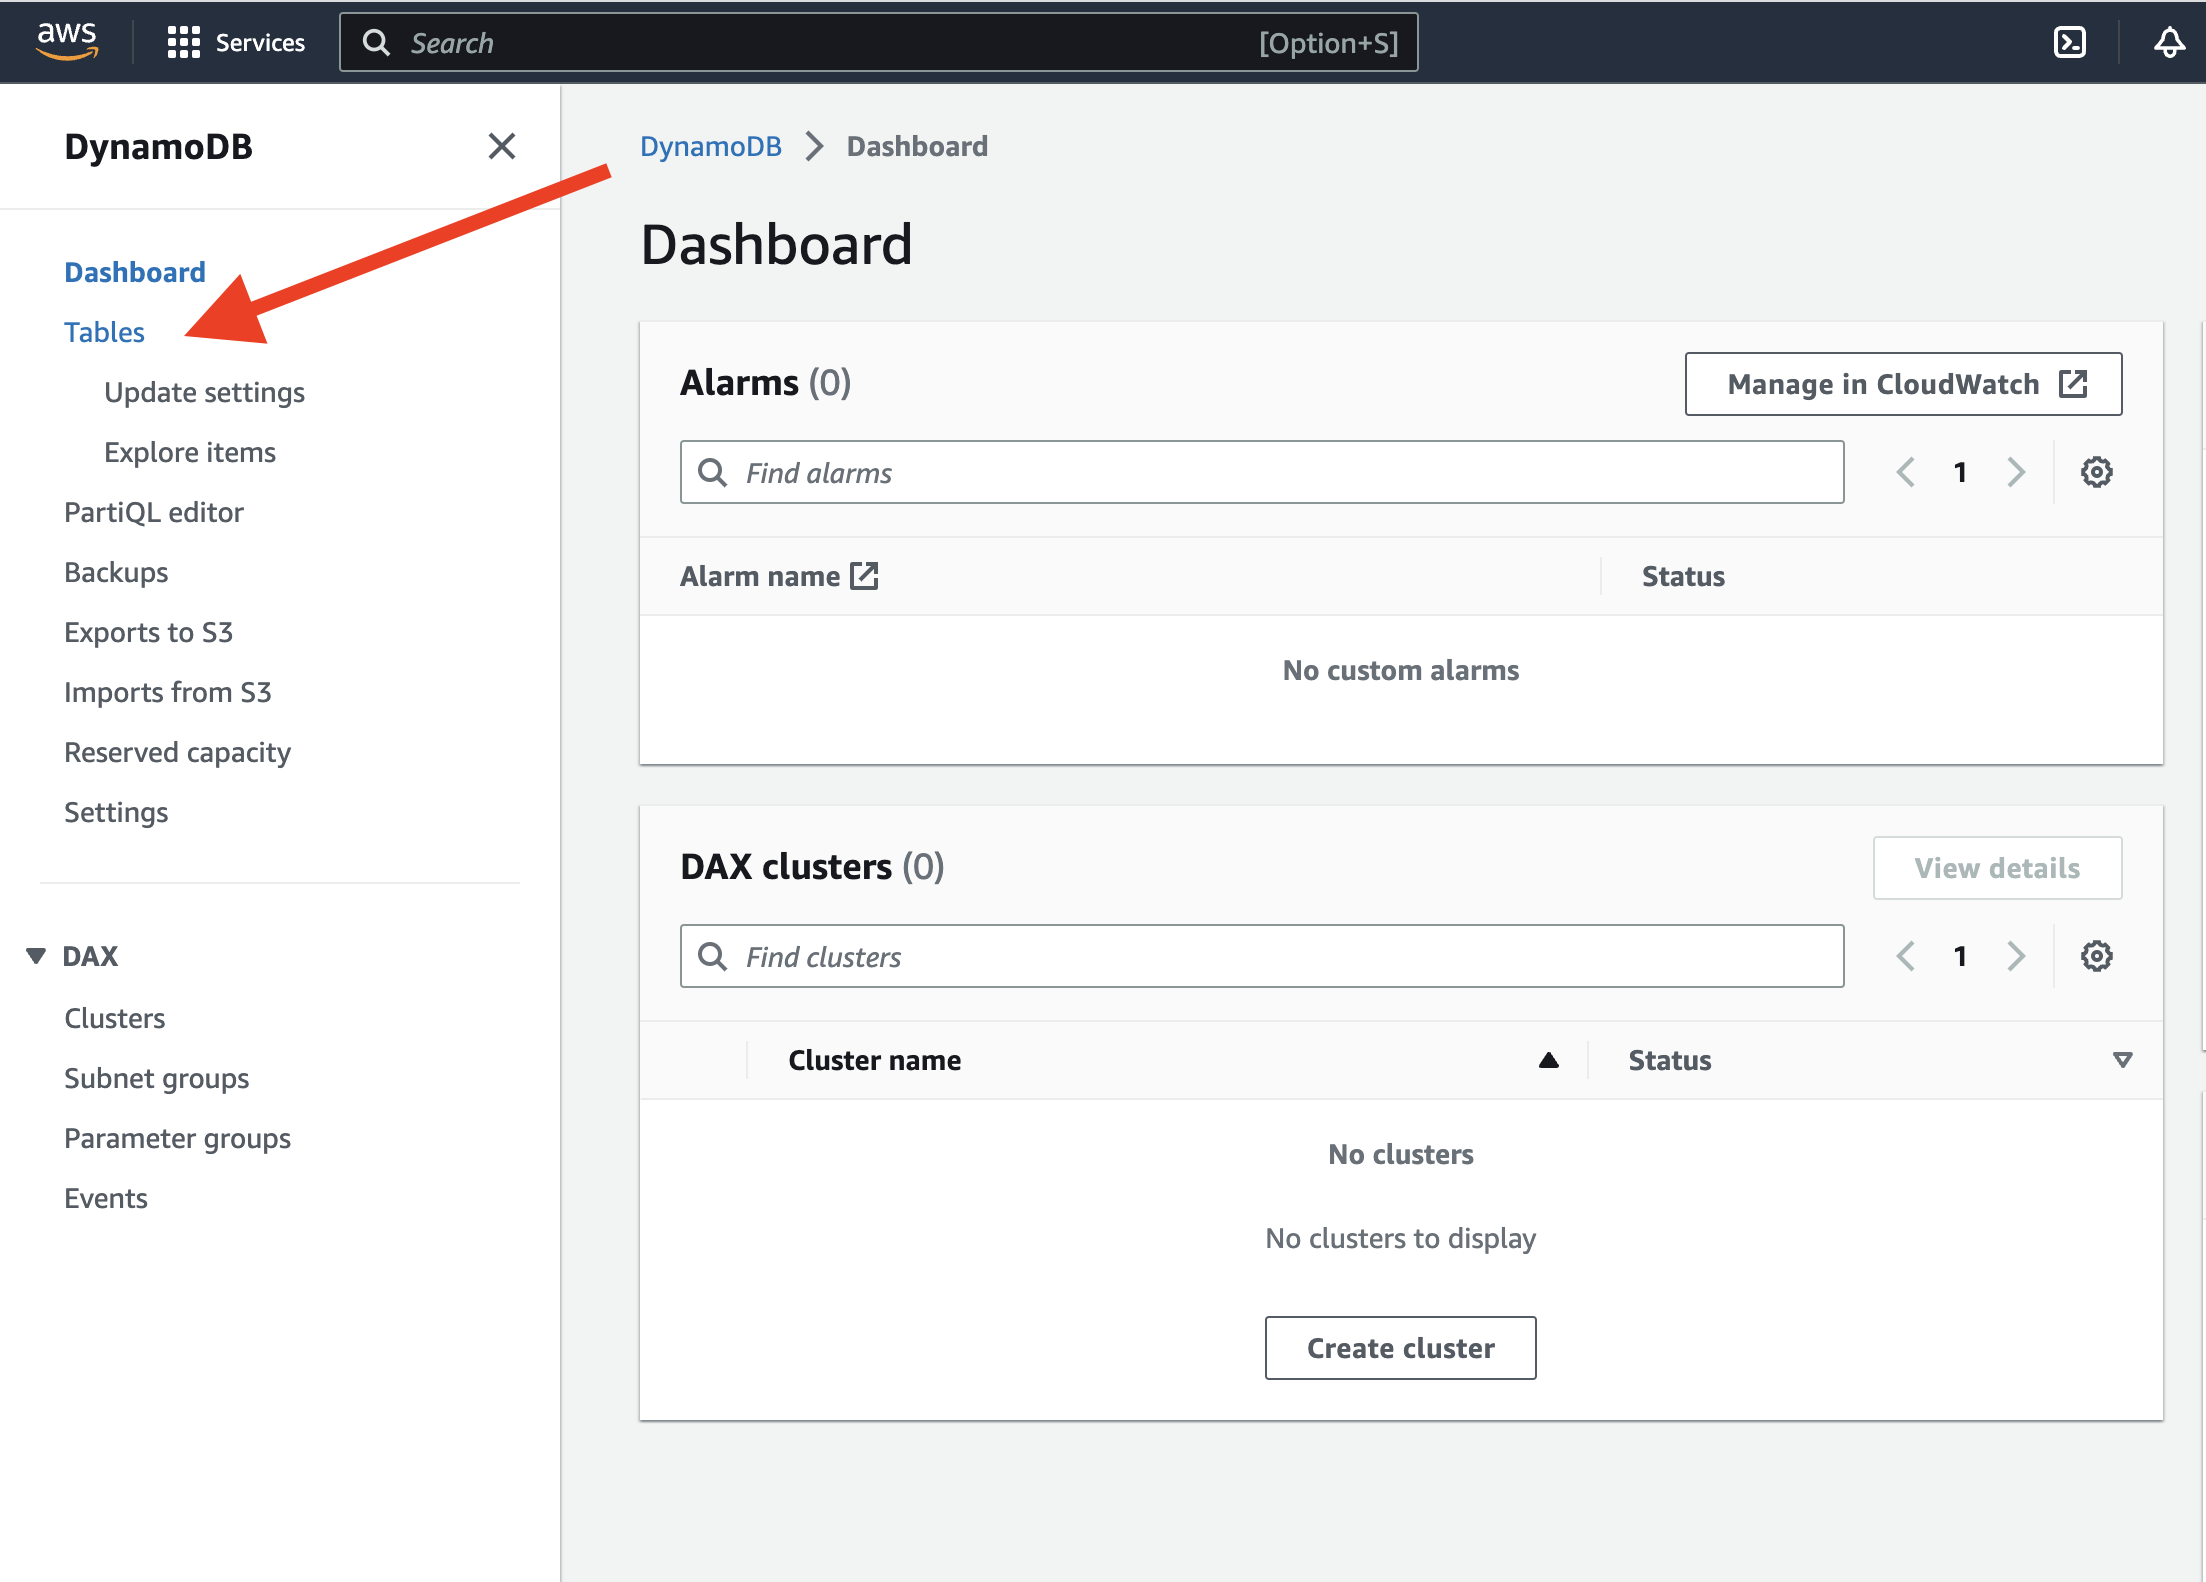

Now we need to explore our table to see the items that we have:
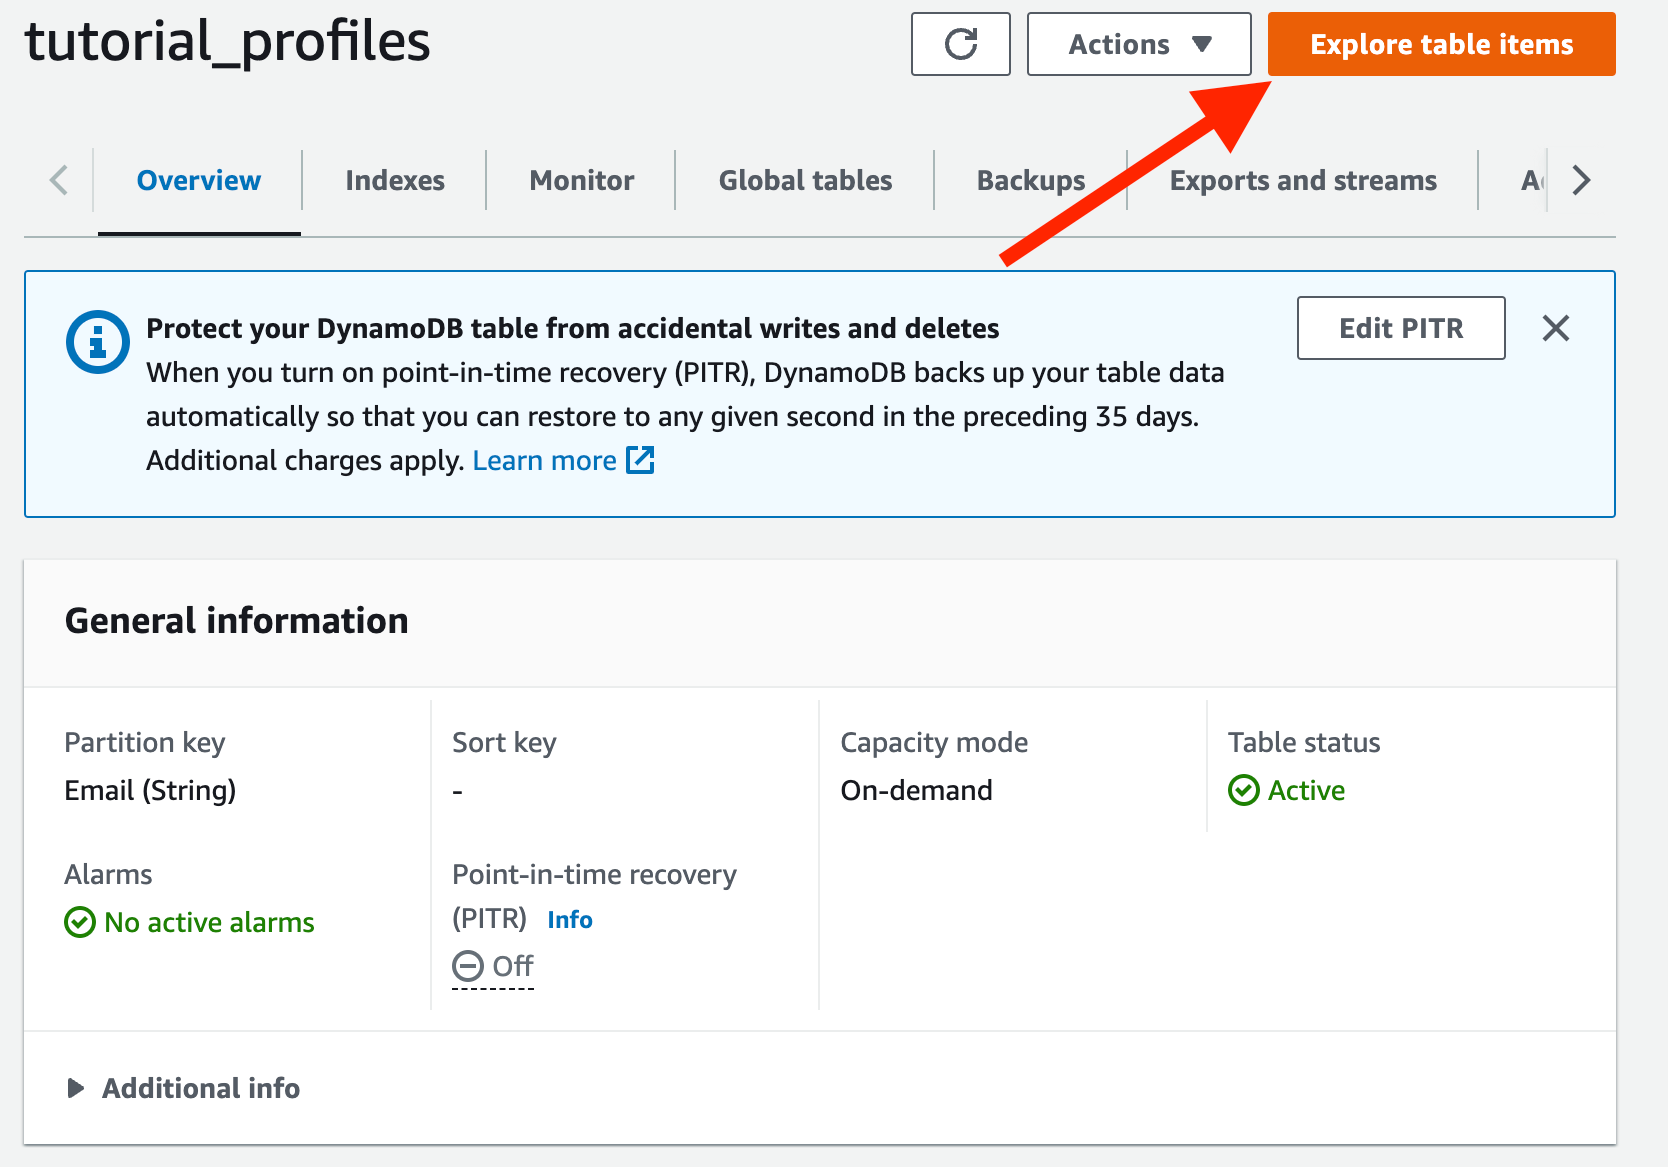
We should see one item with the email test@gmail.com:
🎉 We did it!
Clean up all resources
To clean up all resources we need to run:
terraform destroyand type yes to confirm.
Conclusion
In conclusion, in this article, we've extended our simple Go serverless application built using AWS Lambda and API Gateway, by adding a simple endpoint to store profile data in DynamoDB. We've seen how DynamoDB can easily integrate with other AWS serverless services to build scalable and flexible applications without having to worry about server management.
I hope this article has provided you with useful insights and information about extending a Go serverless backend with DynamoDB. If you have any questions or feedback, please let me know in the comment section below 👇.
💡 If You Liked The Article
If you like the article and want to stay updated on the latest and greatest in software engineering, make sure to subscribe for new article updates.

Happy coding 💻